Bird of Time
As I go through the rebuilding process I'll add each new bit at the top of this page. For those who are following the repair it means you won't have to scroll all the way down to
the bottom each time you visit.
Update 27th May 2013
Well yes, I have been doing something in the past couple of months, some of what I've been doing has even involved this lengthy restoration. I guess I should remind you that this is not a build but a complete restoration of a badly crashed model! So now, finally, I've covered the wings and tried a rough "dry fit" assembly of the model. There is now a few tidy up adjustments and detail finishing to do.
In a couple of weeks I should be ready to apply the paint, start installing the servos and thinking about a maiden flight. Stay tuned - the rate of work might even intensify as the model gets closer to taking to the air again.

The Polyester covered wings - paint next!
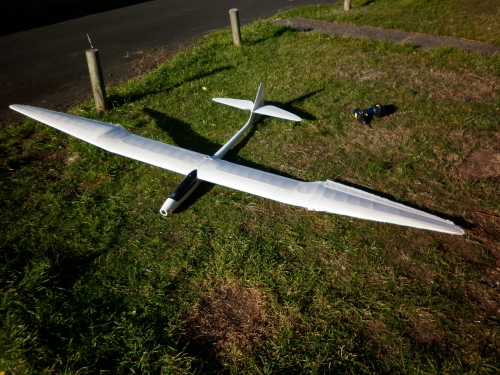

It's even starting to look like a Bird of Time again!

And yes - it is big isn't it??
Update 10th March 2013
Still a steady but slow process to repair and restore this model. I've almost completed rebuilding the wings and they will soon be to the recovering stage. The material I'll be using to recover the wings is a polyester fabric that will add some strength and rigidity to a fairly poor structure. The model was originally an electric power assisted glider and I'n restoring it as a pure glider to be towed or winch launched.

I've rebuilt the smashed port wing root and added a replacement block to support the wing bolt.

The starboard wing root has had a couple of broken ribs and part of the trailing edge replaced. One thing I've found with this model is the quality of the wing sheeting is very poor. There are a number of longitudinal cracks in the sheeting and the sheeting itself is very soft. I measured it at a little under 1mm in thickness!

Re- sheeting the port wing with quality straight grained 1.5mm balsa.

The model is finally starting to look like a Bird of Time. I've removed the lectric motor and I'm making a block nose cone to complete the fuselage repairs. Note that this ARF model has ailerons - original plans that I've seen show only rudder and stabiliser. Next job is to paint the fuselage and install the servos etc.
Update 21st February 2013
I've made a bit more progress on the repairs but it a slow process governed by the need to be so careful when inspecting and cutting back the damaged areas. The old saying about measure twice cut once definitely applies in the case of a major repair. any way - here are some photos of the progress to date and take a close look at the last two photos - They illustrate just how easy it is to miss something if you are not careful !
Repairing the two outer wing panels

And the finished result

The port inner wing had more extensive damage

And required quite a bit of work to repair. I've inserted the wing joiner here to check the alignment of the dry fitted rib and the panel join.

The Completed Starboard wing ready to be fitted out and covered

The work on the Port inner panel almost finished

This join looks perfect and undamaged

Until you carefully examine it and find it's just about ready to completely fail !!
At Last ! An Update.
9 February 2013
This project has been sitting in the back of the hangar since October 2012 and I finally got to dig it out and make a bit of progress. I've almost completed repairing the outer wing panels and started to repair damage to the wing root of the starboard inner panel.

This is what I had to start with after removing all the damage

I didn't try to cut out and shape each individual rib - I just cut rectangular inserts -glued them in and then shaped them into ribs in situ.


Starting to take shape and look like wing panels again. Final step will be to add the wing sheeting.

Then I started to clean out the wing root damage. Careful cutting and paring here - there's a mixture of balsa and hard wood


Also damage to the trailing edge near the wing root


Cleaned out and trimmed

Ready for the next step - repairing the damage
MORE TO COME VERY SOON.
Update 19th October.
It seems I'm working like a demon on this rebuild but the progress that shows is not inspiring - still any progress is better than none.

To start with it is important to make sure you remove ALL the covering. I discovered this crack under one of the last small pieces I removed - the crack is in the aileron spar and didn't show the through the covering!


I NEVER try to just glue a crack. I always break it, cut out section and glue in a bracing piece.


Now I've started cutting off the broken spars and preparing them for a scarf join to the new parts. It's best to make the joint as long as possible. Note where I marked this out and then found I could extend it a bit longer.


All cut and trimmed and ready to join in the new pieces.
The First update
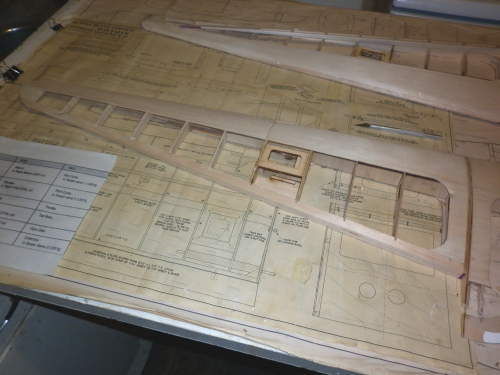
The first job in any rebuild is to completely clear away all the damage and establish just what is left to work with. This can be a very sobering process when you find there is very little left to work with.

Both wings are extensively damaged. This is the joining point between the inner and outer port wing sections. Oh - and yes - that is the Lancaster plan underneith.

The Starboard inner is a bit worse off.

And the port outer panel. Normally I'd probably replace this completely but I'm going to see if I can rebuild it.
Next - rebuilding both outer panels. Coming soon!
Bird of Time
Start here to read the whole story
The model is extensively damaged as the photos show - it's an ARF version that was built as an electric power assisted glider - FRP fuselage with a substantial crack on the starboard side under the cockpit and just forward of the wing mount - both wing inner and outer panels damaged and the all flying stabiliser is damaged as well. My intention is to rebuild it as a pure glider.
Oh! - before some one tells me - I know - the inner wing panels are reversed in the photos

The sad and sorry result of a nose dive from altitude

Port outer

Port inner

Starboard inner

Starboard outer

That crack is about 6 inches (150mm) long!

The all flying stabiliser didn't escape either

Cause of the mess - stripped gears on a servo - stuck full down elevator - ouch